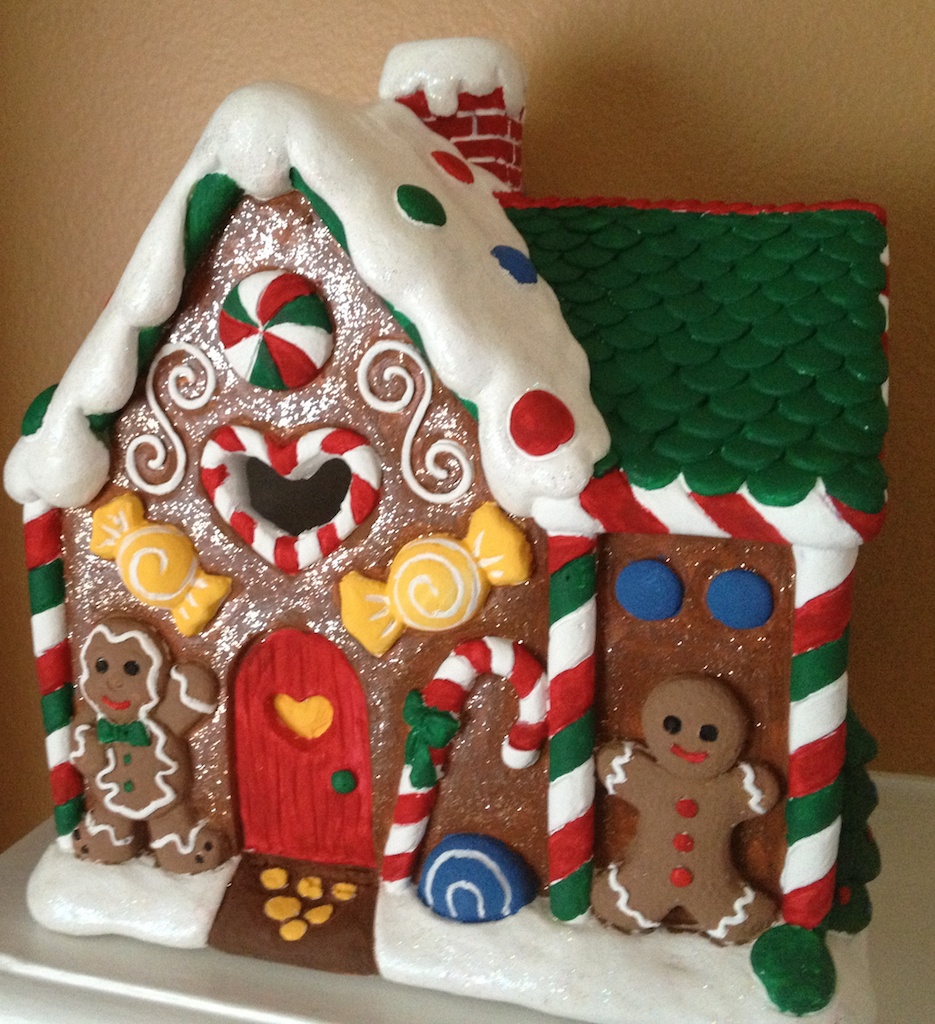
I saw some Kurt Adler gingerbread houses online and then in a store; I coveted. They are kind of pricy though. I found a plaster gingerbread house on sale at Michaels for around $5 and painted it; I was ahem “inspired” by the Kurt Adler color scheme.

I probably spent around $15 on paint, but I have plenty left over for other projects. 15 paint colors were used in all. The sparkly effect of the walls was created with a basecoat of Americana acryrlic “Milk Chocolate” and a topcoat of Martha Stewart glitter acrylic “Sunstone”. The glitter paint is pretty evenly applied throughout, but the sparkle is more obvious depending on light and perspective.


I also created a more subtle sparkly effect for the snow on the roof and around the base with Craftsmart Glitter “Crystal”. The right back corner is broken off at the base; unfortunately I didn’t notice this when I bought it and they were all sold out when I went back back a few days later to exchange.


The house is around 7.5″ wide across the front, 5.5″ deep, and 9″ tall, so it is a decent size. It still needs a little light for the inside. This project took a while, something this large and detailed requires some patience. At least 2 coats in many areas were needed to acheive color saturation/consistency and a tiny paintbrush was used for all the small details. So, a lot of work, but I am very happy with the outcome. I have this displayed on a window sill in my breakfast room.

Ornament wreath. I started with around 80 dollar store ornaments, wired ribbon, and 12 gauge floral wire (Supply cost was ~$14). The wire is a bit too bendable, and my wreath isn’t a perfect circle. First I secured all the hangers to the ornaments using hot glue and cut off the hanging loops. I started out using an online tutorial, but I wasn’t happy with the way it was coming out. Letting gravity do its thing created a very full look, but half the ornaments were on the back side and more or less invisible from the front- I didn’t need a dual sided wreath, I’d rather have a wreath that is mostly flat on the back side. So I laid the wreath form (wire) on the floor and put the larger ornaments on deliberately, some above and wire and some below-as many as I could fit around, trying to disperse the colors and types. Then I arranged the smaller ornaments over top, to fill in the holes, and hot glued the whole mess together. At that point, I still needed some tiny ornnaments to fill in a few small holes (none of my dollar store ornaments were small enough). So I used a $4 box of 24 mini ornaments from Target. I made a six loop bow and wire hanger. Isn’t that ribbon cool, with the ornament print? If I did it over again, I might start with a foamcore wreath form and simply hot the glue ornaments to it; this would allow you to skip the first step of securing the hangers (because you wouldn”t be using the hangers). This wreath is very traditional Christmas colors, obviously, but I wouldn’t mind doing one in a different scheme, like icy blues and silver.

I painted some wood letter blocks (~5″ tall) to spell “Noel”, undercoat of Tuscan Red and topcoat of Red Glitter, both by Craftsmart. It took 3 or so coats of each… lengthy project with all the drying time, but super easy.

So, not crafted, but I did a bit of shopping. Here’s my Santa, 18″ tall and standing at the left side of the hearth, by Kurt Adler/Jacqueline Kent… acquired this at around half price, via Ideeli.

I picked up this pair of reindeer on Ebay. The standing one is ~12″ tall. They are nicely detailed and elegant IMO .

The overall mantle and the tree, you can read about some of the older crafted projects (floral arrangement, stockings, tree skirt, snowflake bunting), here. This year, I affixed crystals to the reverse side of the snowflake bunting (which faces the dining room) so it would be truly reversible.

I also did some sewing and framing of Christmas projects, look for that soon! There were several more crafty ideas rolling around in my head, but time was short; I didn’t have any vacation time prior to Christmas and I’m 7.5 months preggo! I baked 3 kinds of cookies- Chocolate Oat Treasures, Sugar Cookies, and Peanut Butter & Chocolate Chip– many of which were taken to work as a Happy Holidays gift for all. I work among a very diverse group, but everyone appreciates cookies! After that, a lot of my free time was devoted to baked and candy gifts. I made caramels, marshmallows, spiced cocoa mix, chocolate truffles, cinnamon bun bread. I divided the chocolate truffle recipe into thirds. Batch #1 was flavored with a dash of vanilla extract and rolled in sifted cocoa. Batch #2 got a dash of peppermint extract and was rolled in crushed candy canes. Batch #3 got a spoonful of peanut butter and was rolled in crush peanuts. The yield was 8 of each (24 in all). I assembled some marshmallows and the cocoa mix into a “Hot Chocolate Kit”. Some of the caramels and marshmallows, I dipped in tempered dark chocolate. Holy cow, they were delicious. Finally I made apple pie and sweet potato knot rolls for Xmas dinner. My sweet husband helped with many aspects of the food prep where an extra pair of hands came in handy (and the dishes too!) His presence is the best Christmas gift of all.


Leave a comment